Custom OLED Display Holder
Saturday, February 20th 2021
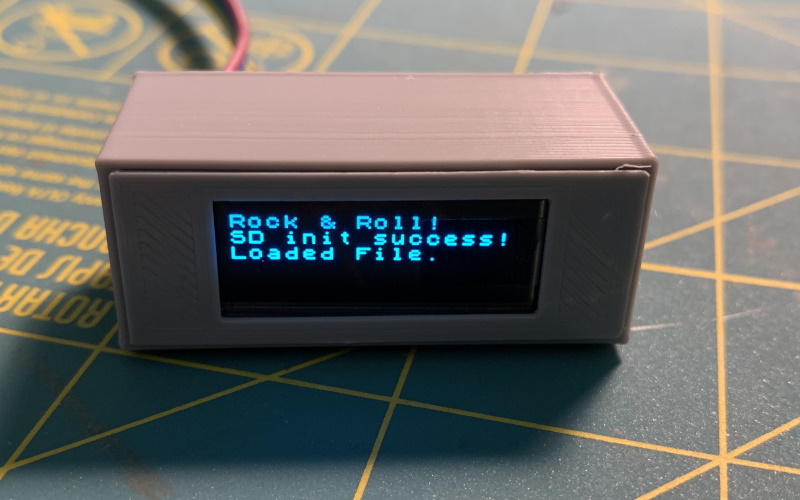
I've been working on a larger project. Which I hope to post on here in the coming weeks. I find that sometimes it best to break projects into smaller pieces. Little milestones make bigger projects flow a lot better. The enclosure for my new project requires a holder for OLED display. I've never modeled anything like this before. So I decided to do a small project out of modeling a holder for it. Here we are now. I present to you my holder for a 128 x 32 OLED display.
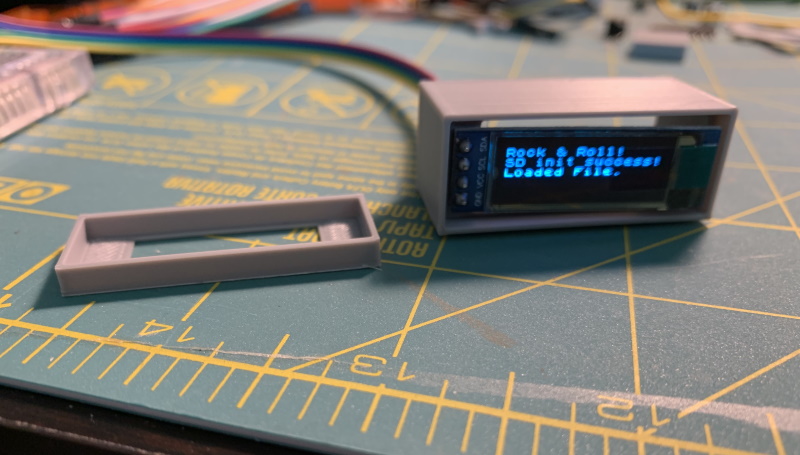
I used TinkerCAD to create this model. It's a fairly simple concept with a hidden feature. More about that in a minute. The model consists of two prints, the holder body and bezel. The OLED display I'm using is a 128 x 32 sized display. It uses a I2C connection which requires four pins. Here's where the hidden feature comes in. I wanted to keep the holder a modular as possible. In the sense that the display could be easily pulled out and reused if needed. In order to that I had to come up with a design that kept the OLED display as stock as possible.
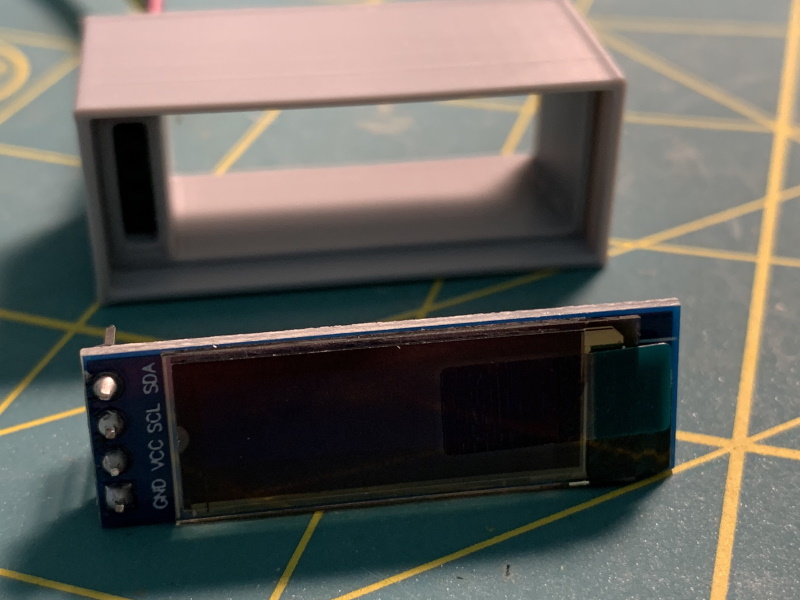
On the back of the display I soldered a standard breadboard friendly header. This allows me to plug this directly into a breadboard if I wanted to experiment with it. This got me thinking. What if I could make some sort of socket that allowed me to plug the display in and remove it as needed? Then it hit me. I could use female headers like on a Arudino board. To keep it simple, I used premade female dupont wires. All you have to do is push the four dupont connectors from the back of the holder. I modeled the rectangular hole with a fairly tight tolerance. This forms a friction fit. Then you can install the display from the front. Slide the bezel into the front of the holder and you're done.
If you would like to download and print this model for yourself then click the link below. I'm looking forward to doing more projects like this. Keep an eye on this space!
ThingiverseCategories: Maker
Tags: 3d-printing, electronics, soldering, thingiverse, tinkercad